It’s typical that most of us have too much stuff in our garage. Finding a way to get items out of the way in a safe and secure manner can be a challenge. Many people build their own shelves but the cost of lumber isn’t what it used to be. Using wood only means having to build it heavy enough to support the weight.
I wanted heavy duty shelves that were high enough so they could be walked underneath. Since my garage has a ten foot ceiling I wanted the shelves at least 6.5 feet off the ground leaving a space of 3.5 feet above. Also, I didn’t really want to have to build diagonal supports above or below the shelves. There is little to attach a shelf to unless the walls in a pole building are framed. Often there is an 8 foot span between poles to deal with making it harder.
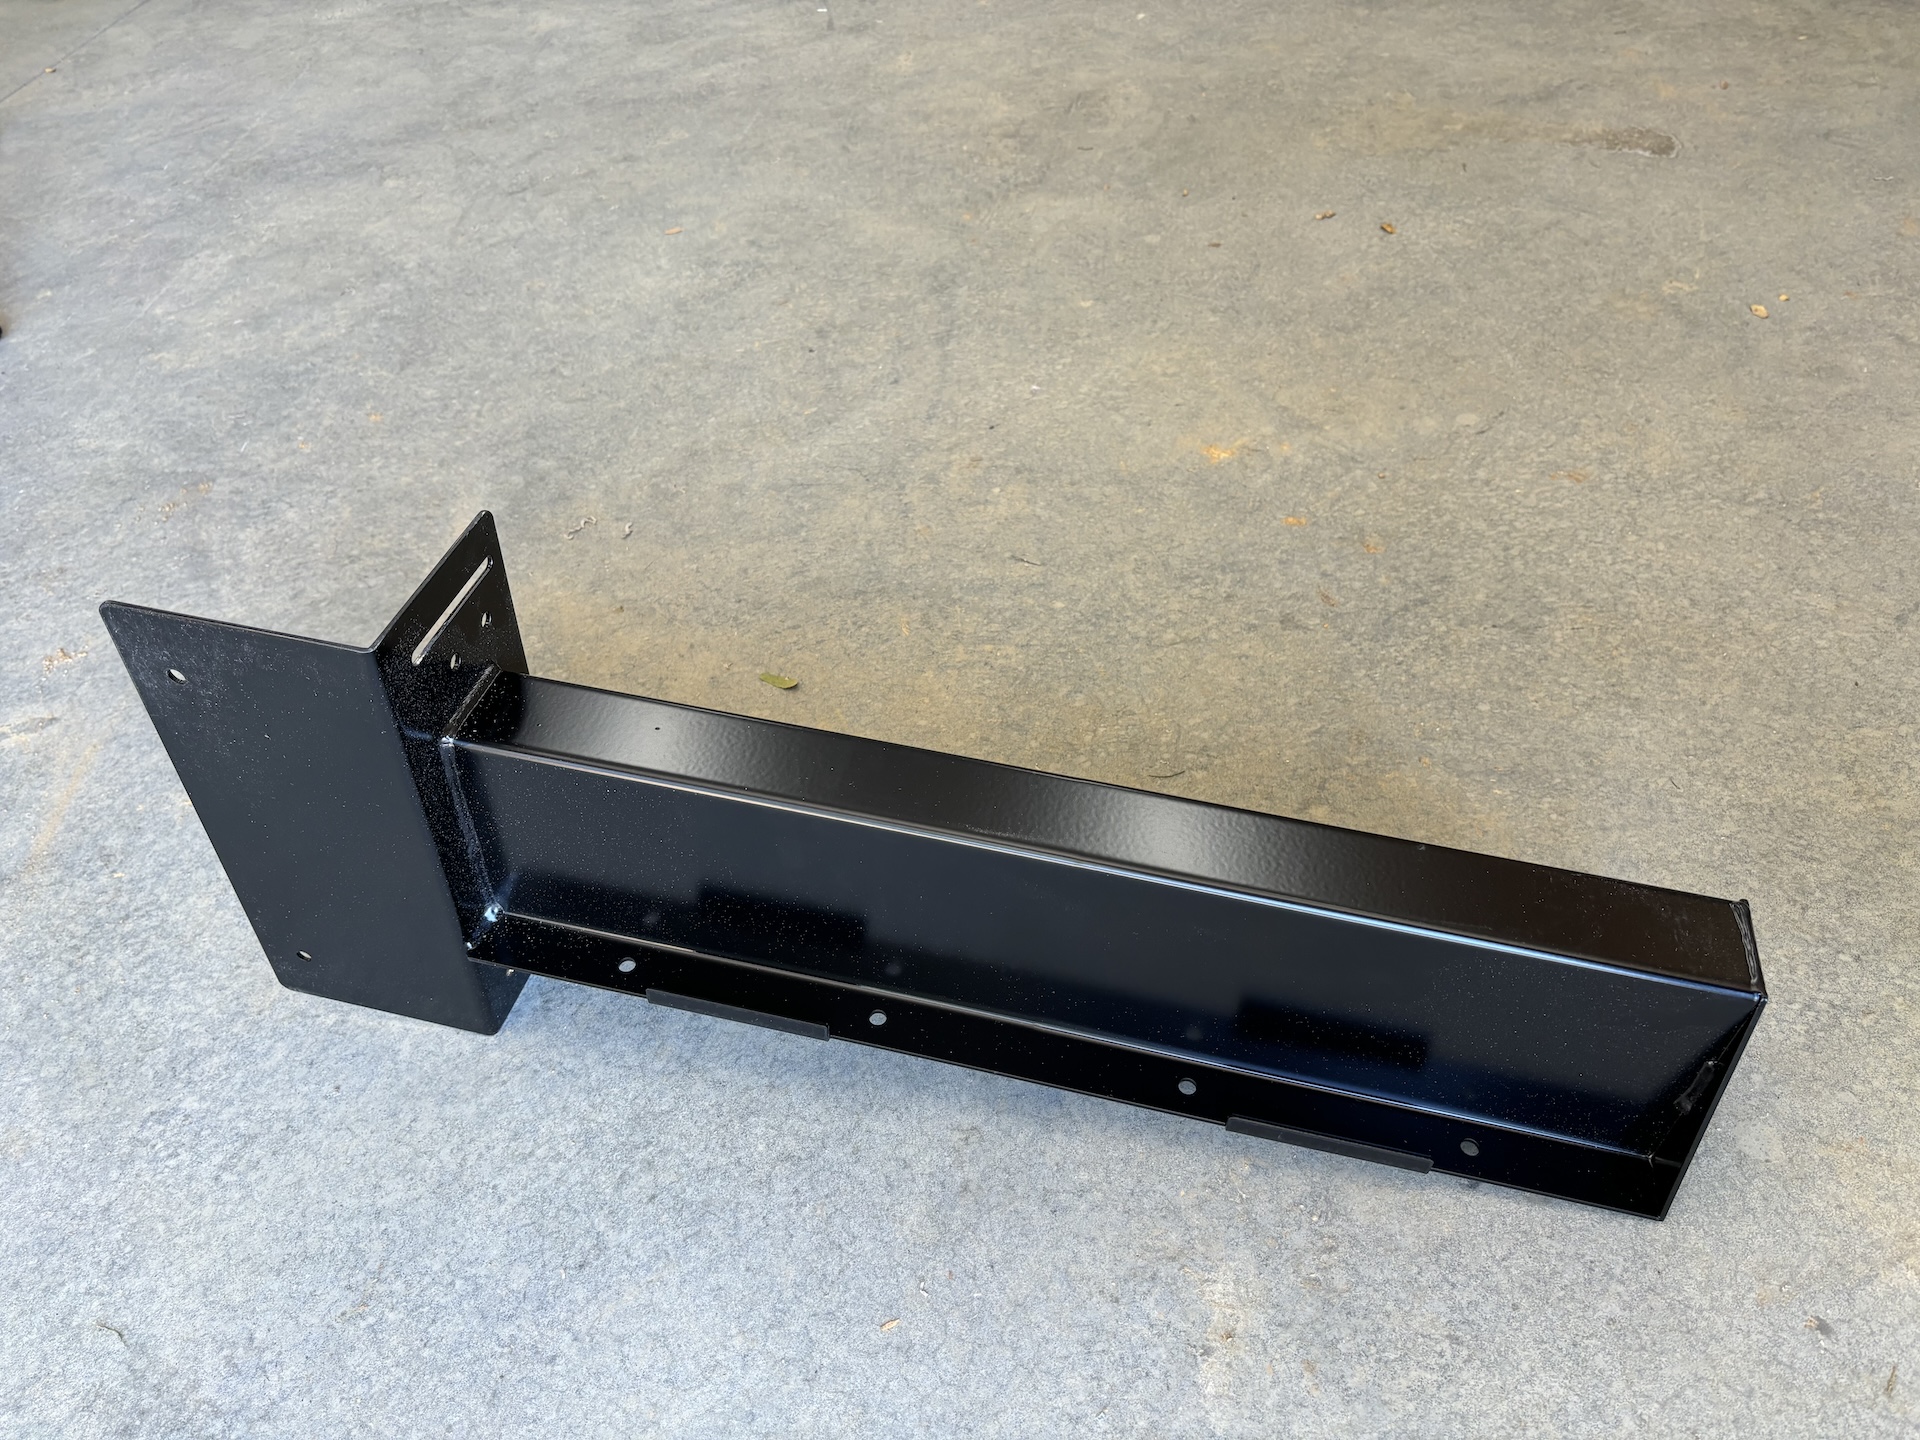
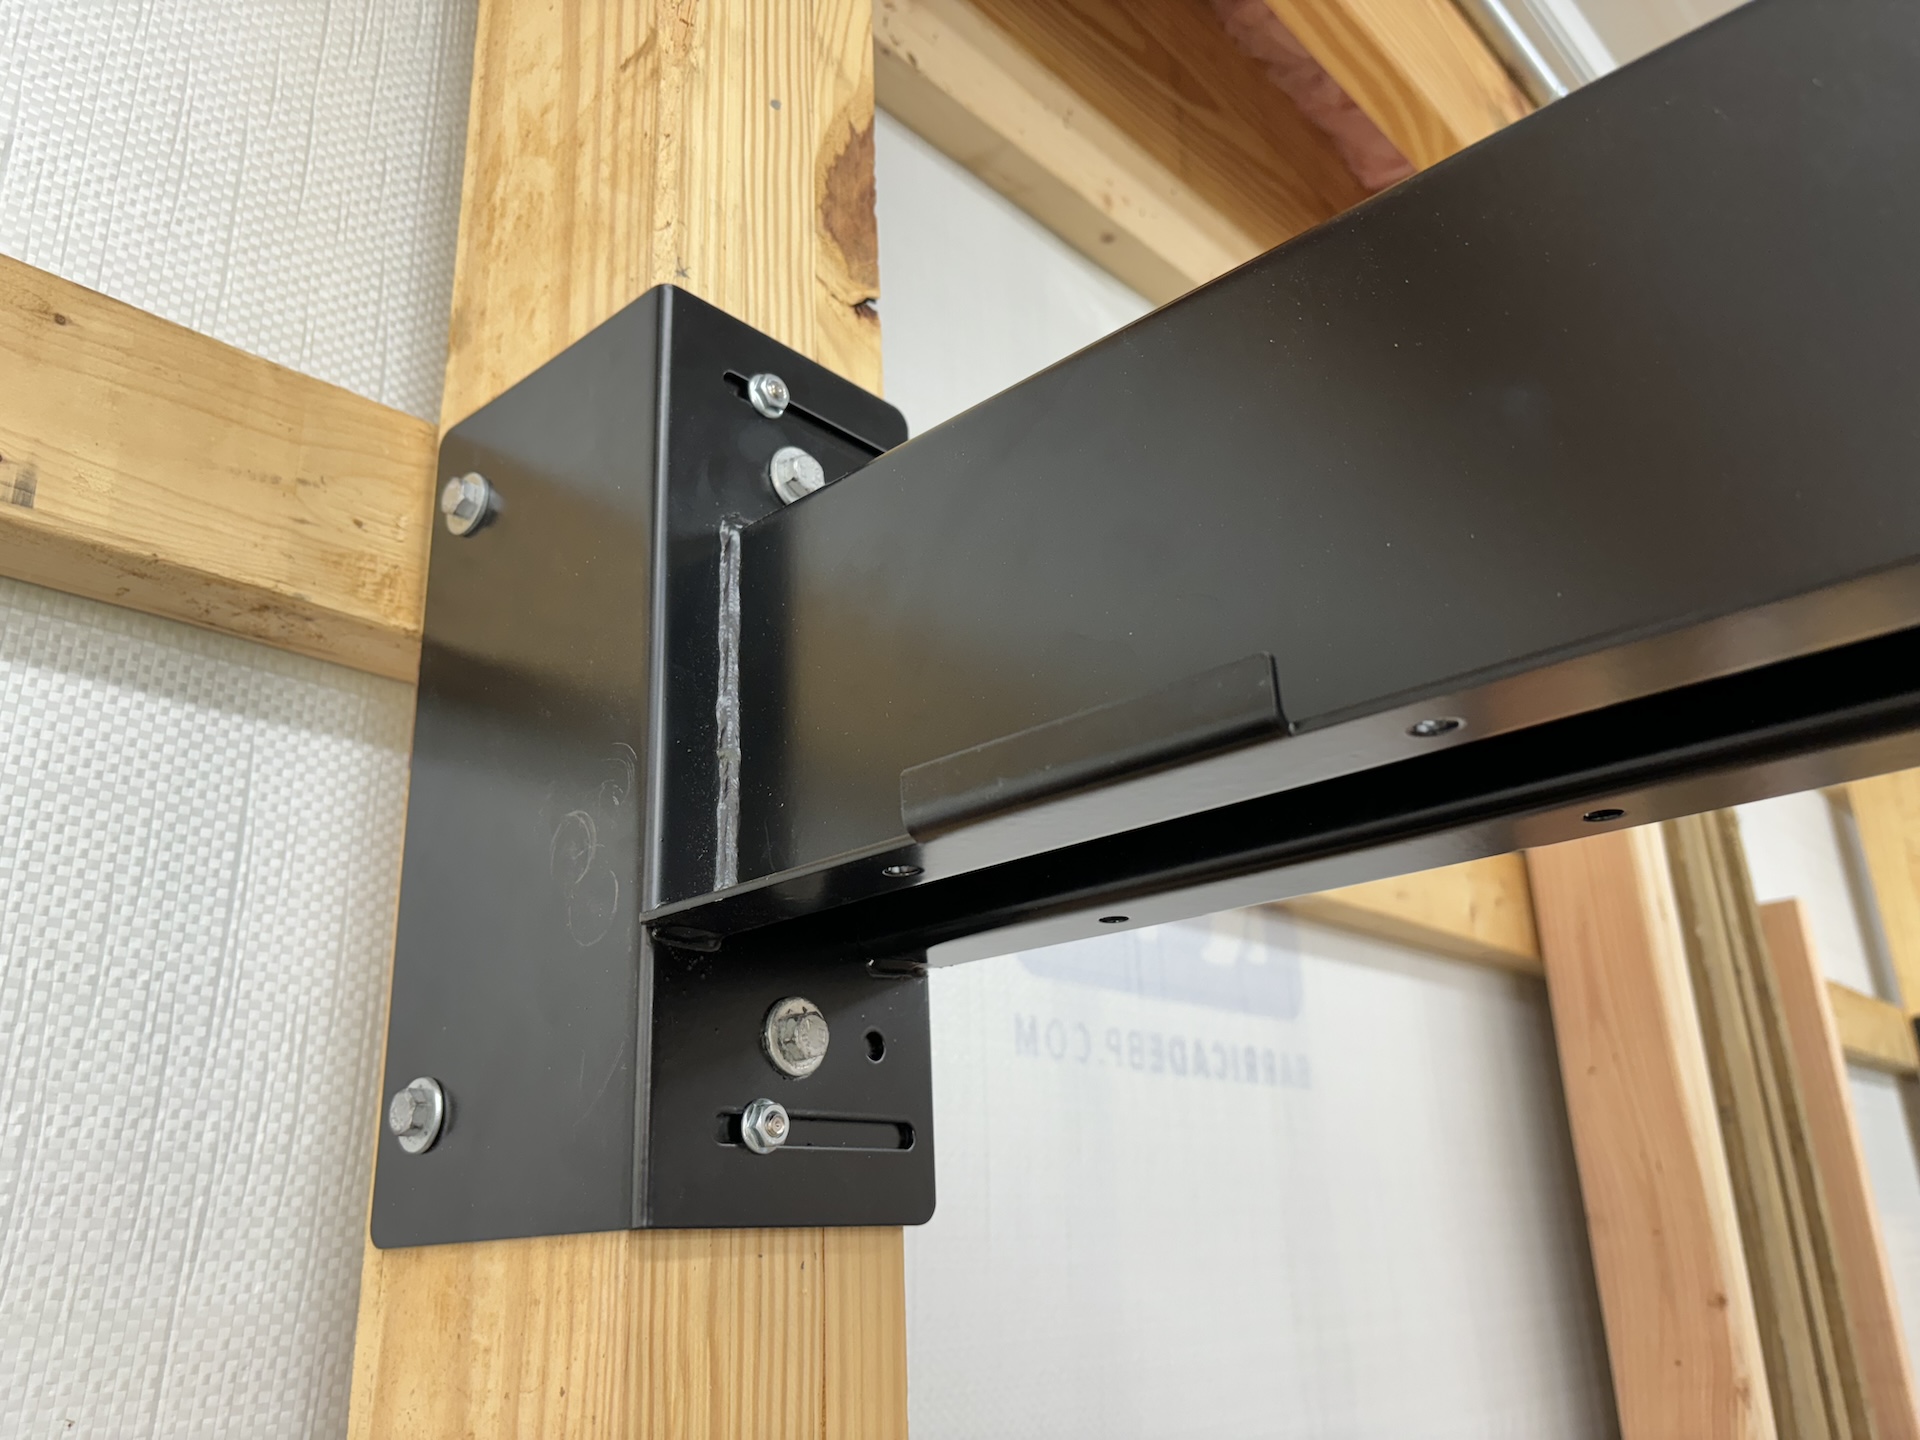
Scott Systems Post Rack Shelf Bracket
Before my project began I spent a lot of time on garagejournal.com looking at all kinds of garage things. Organization ideas including shelving was definitely part of it. While perusing I came across a post from someone about the Post Rack Brackets from Scott Systems. These brackets are made of steel and mount directly to the poles in a pole building. These are exactly the kind of shelving I was looking for.
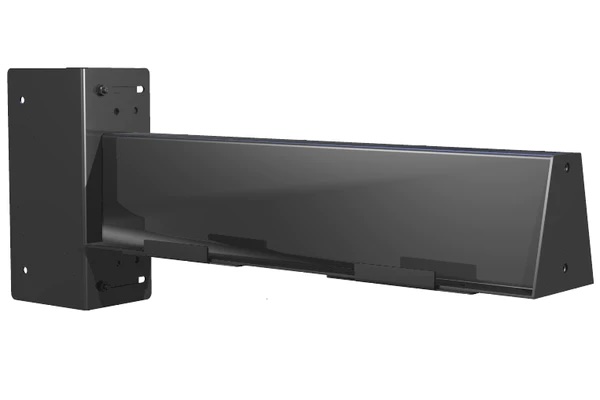
The beauty about the Post Rack Shelf Bracket is that they mount directly to the pole. These brackets can support heavy items without the need of extra support above or below the bracket. Lag bolts and washers are included with each bracket. The bracket has an adjustable width so they can fit a variety of sizes of pole building poles.
The bracket only provides a mounting point, I would need to build the actual shelves from lumber. There are a few ways I have seen people make their shelves and I used a combination to get the result I wanted. More on that later.
Post Rack Shelf Bracket Installation
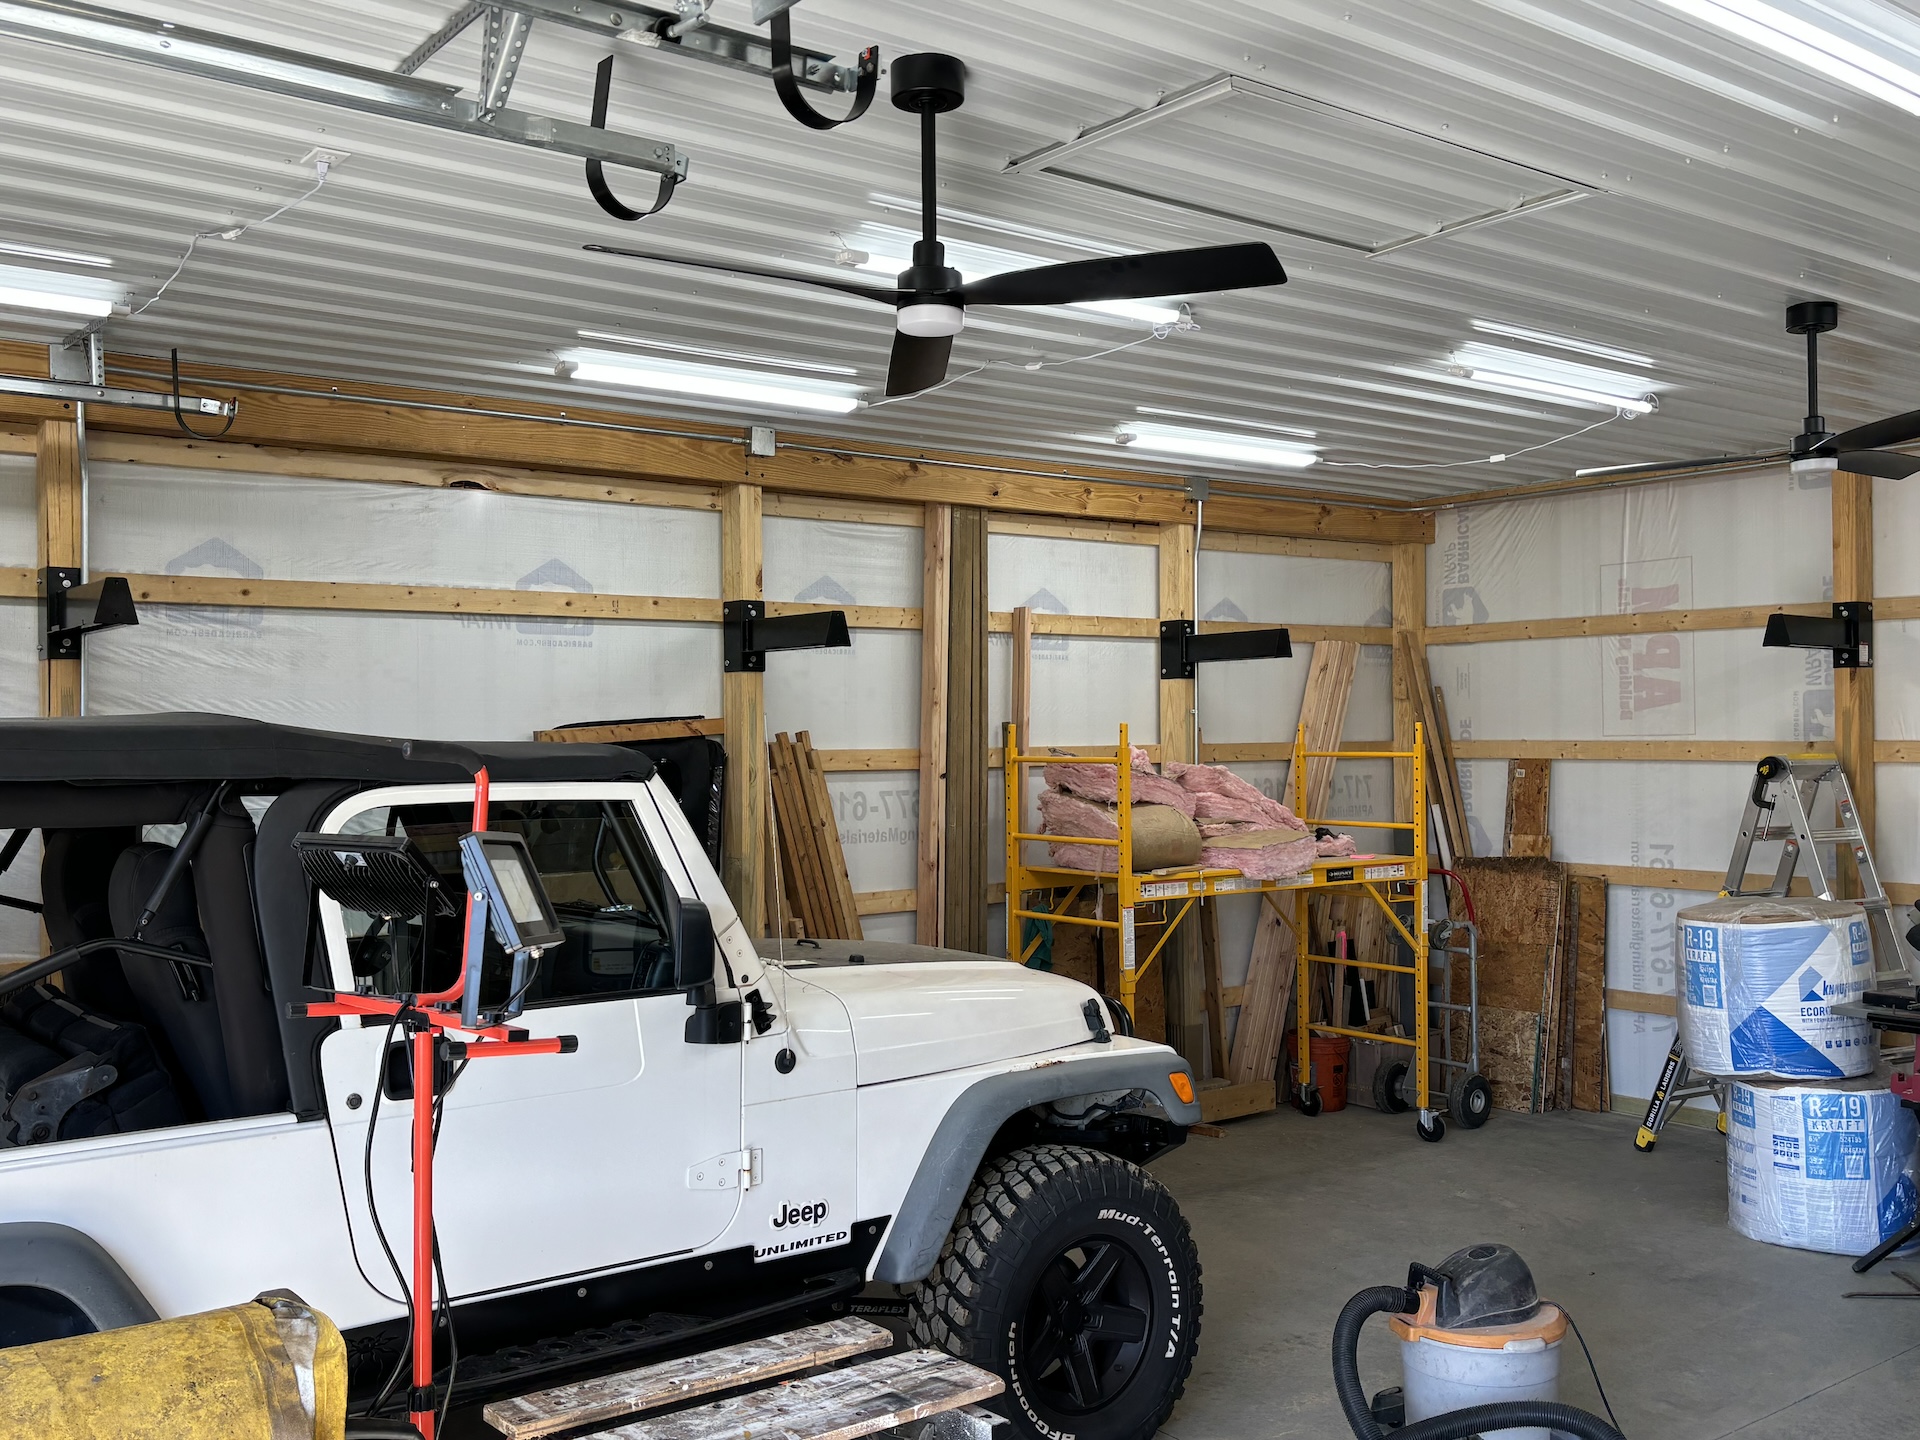
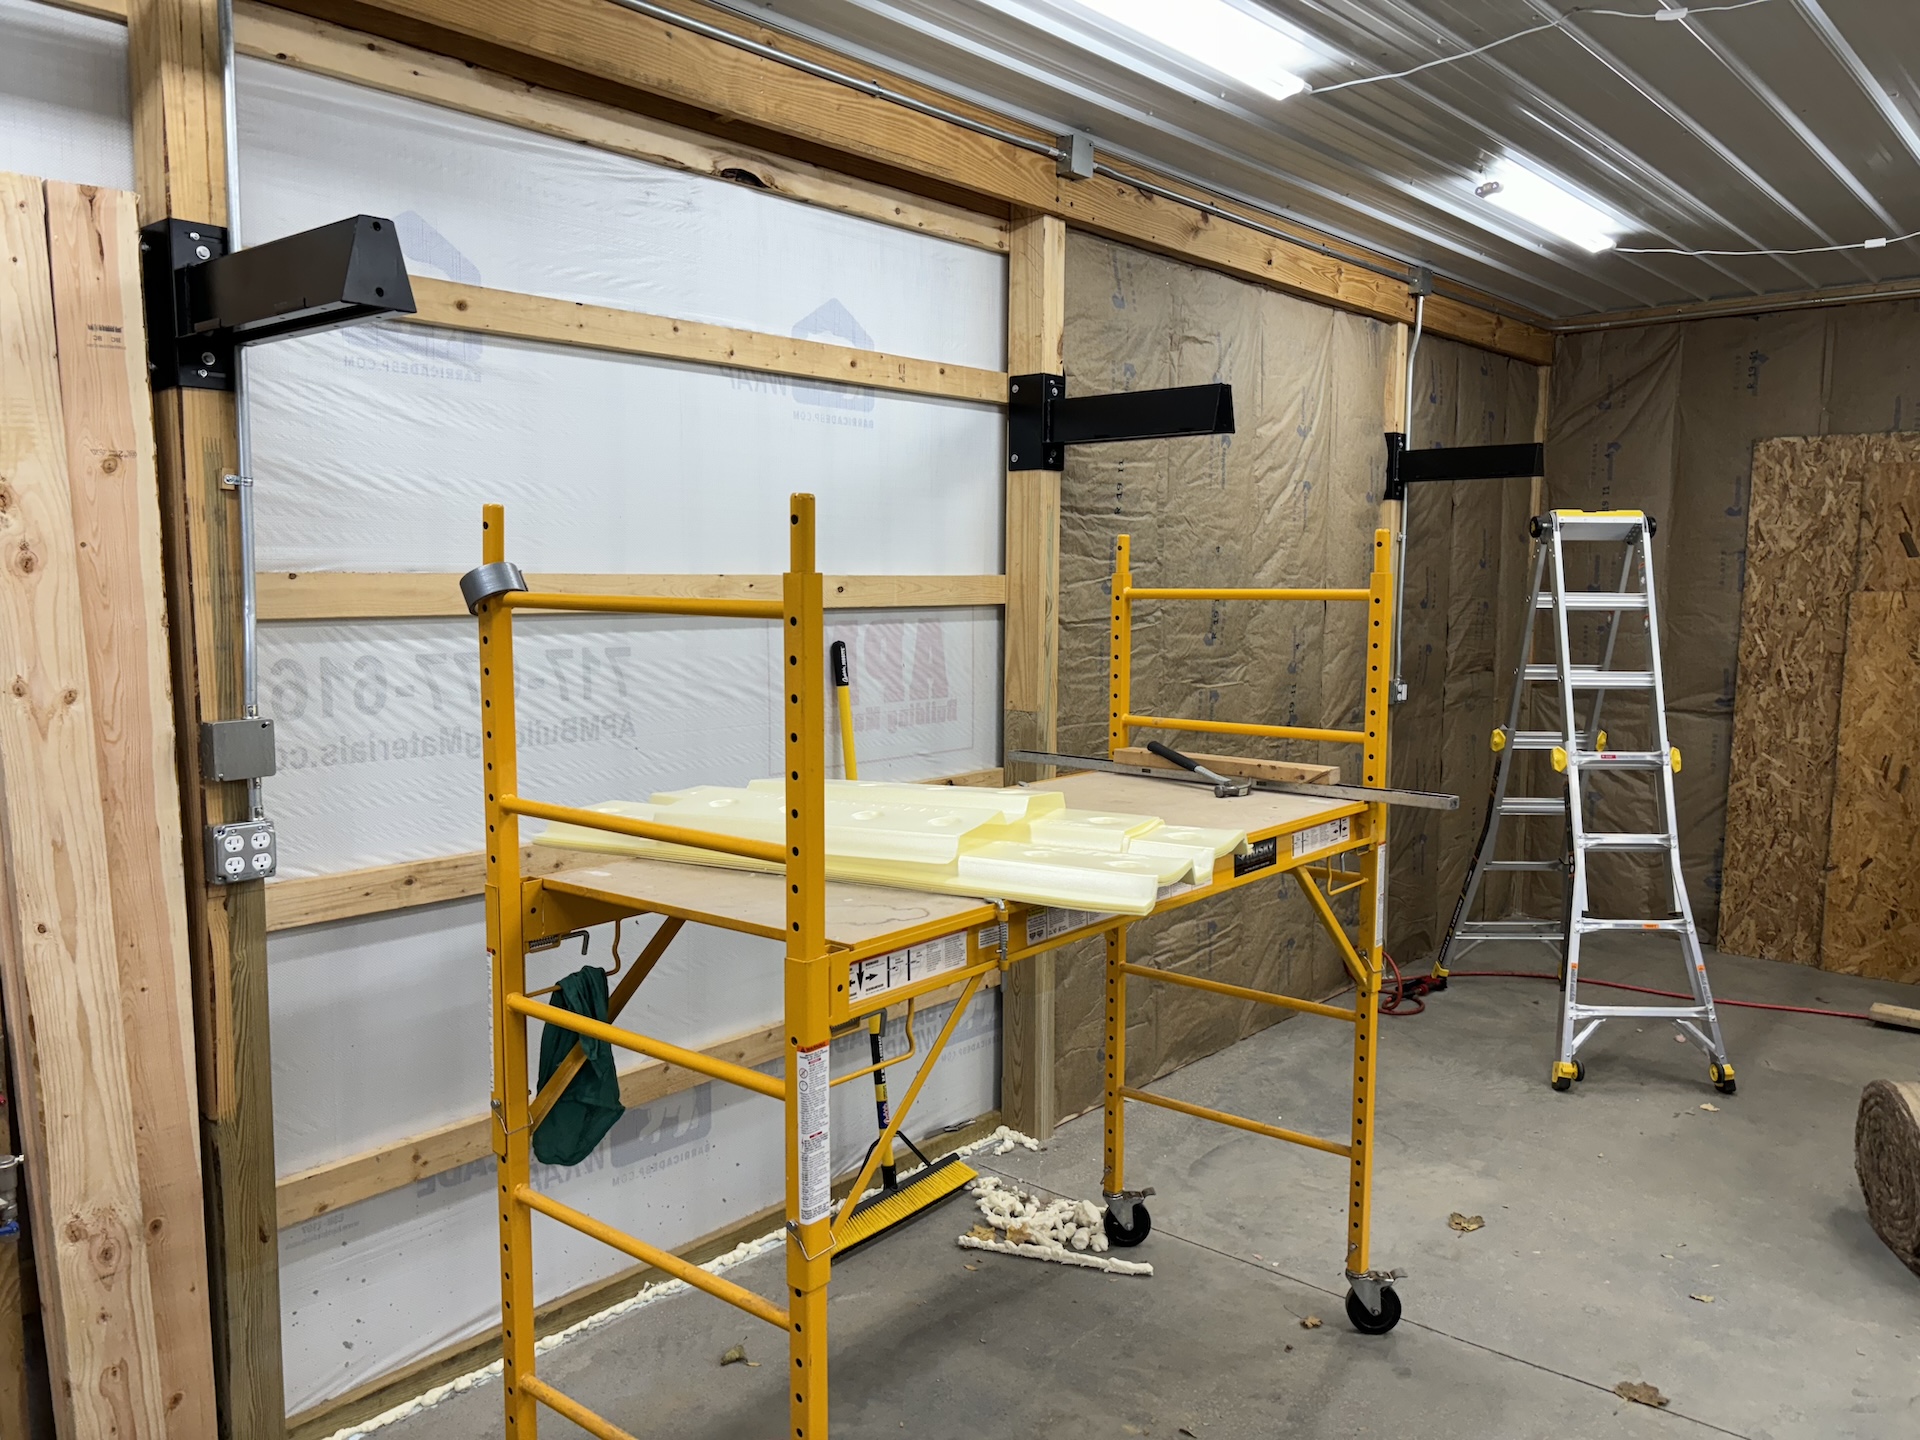
Since I planned out how my shelves would be positioned on the wall, I purchased a four pack of these brackets directly from Scott Systems. I was planning to frame in the walls to cover with drywall and corrugated steel. This meant that the brackets needed to go up before the outer part of the wall. The drywall will block access to the sides of the poles.
The shelves would need to cover a corner so three of them would go on one wall and the fourth would be on the adjacent wall. There is no bracket that is specifically designed for a corner so I would need to fabricate something to properly support the shelf.
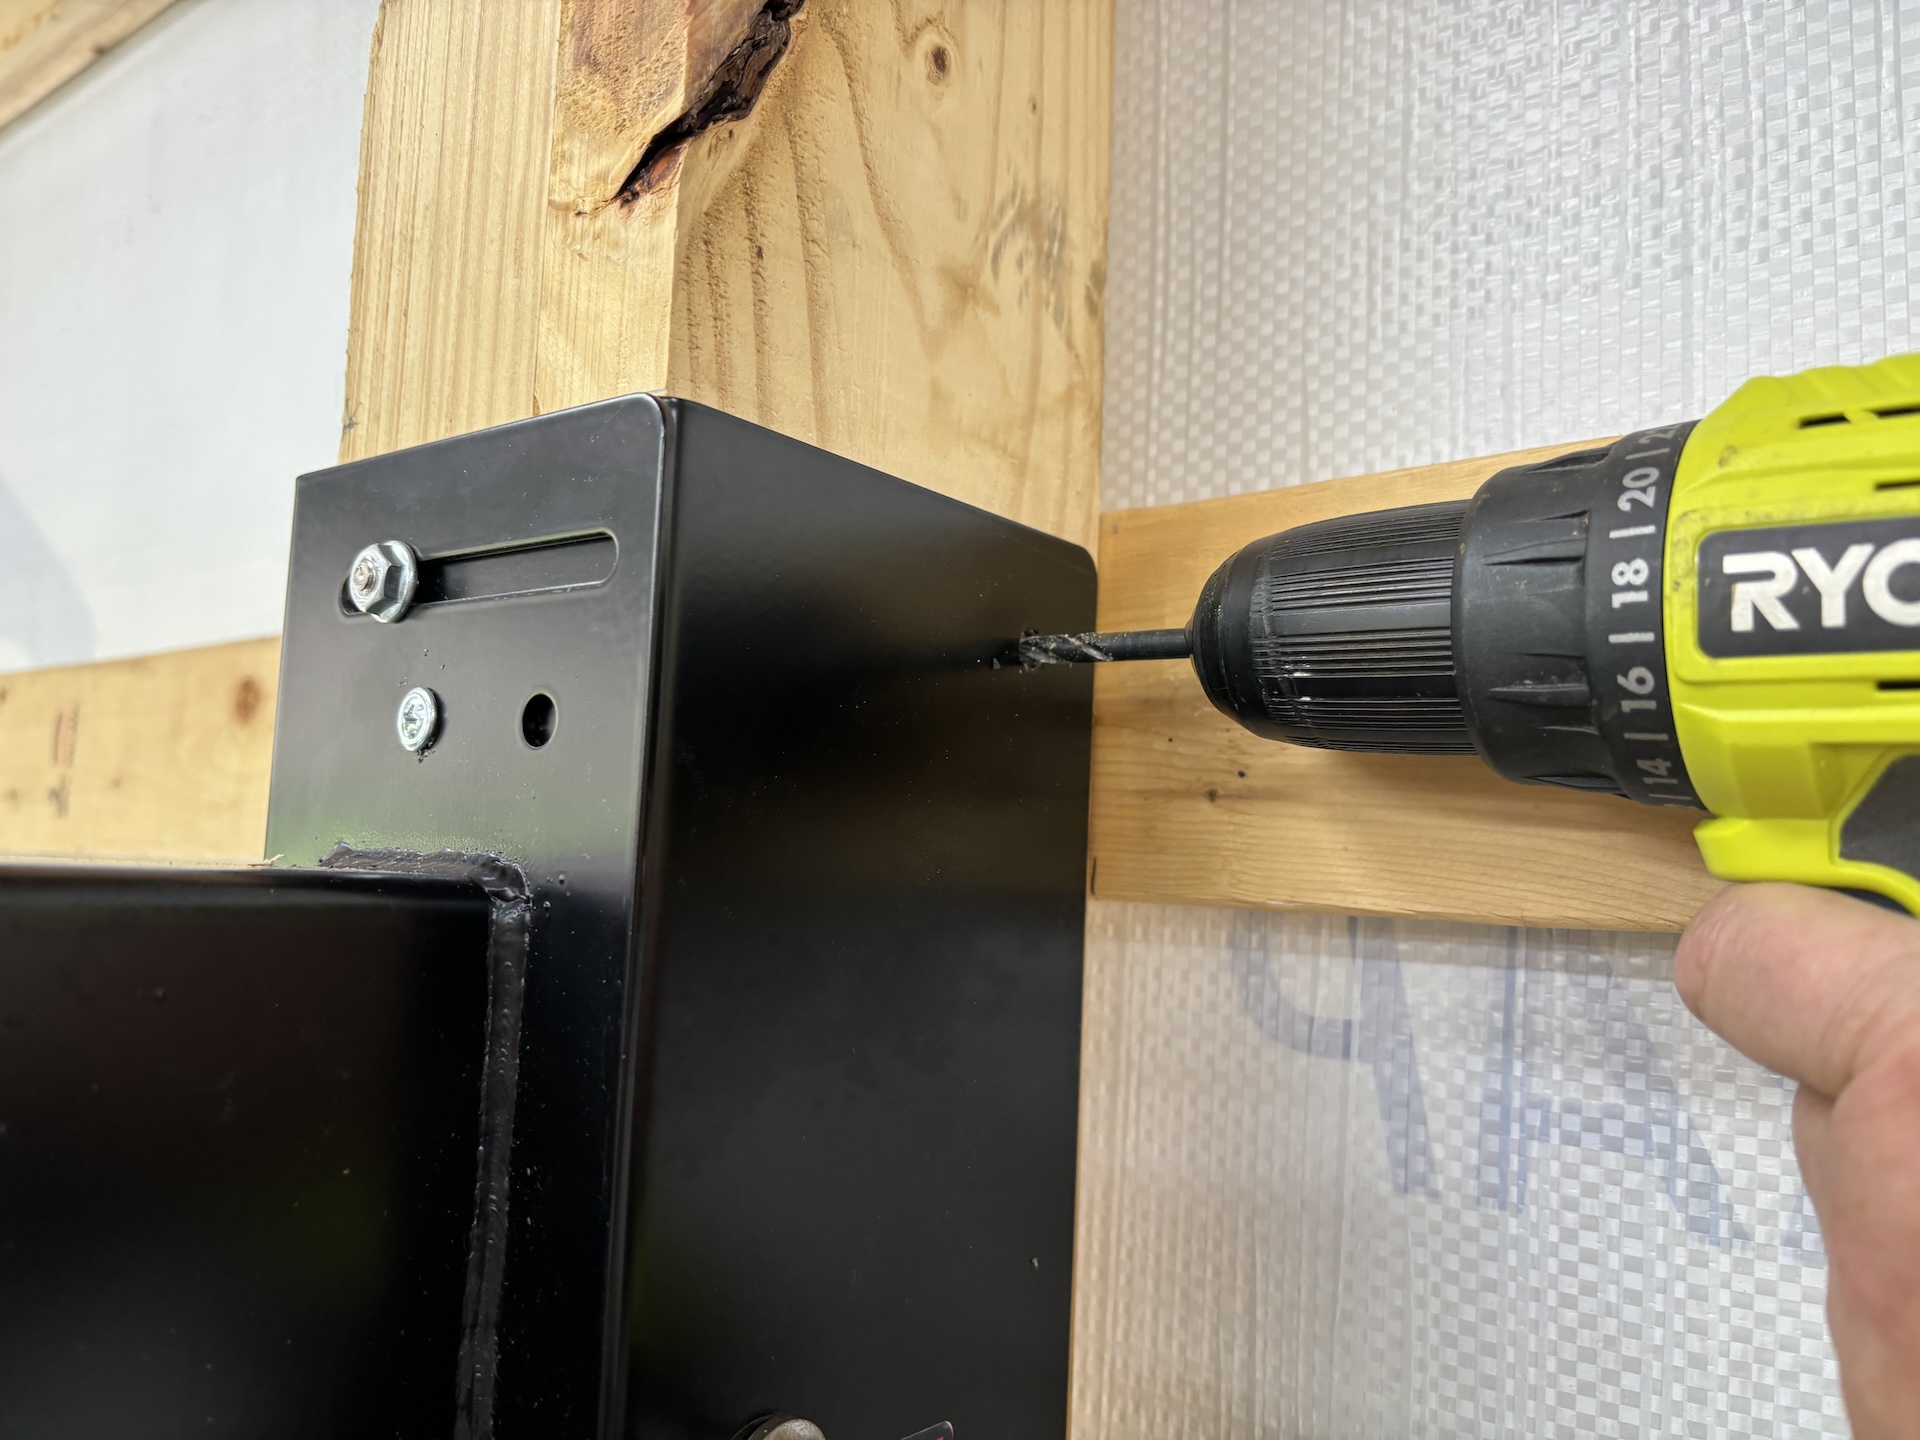
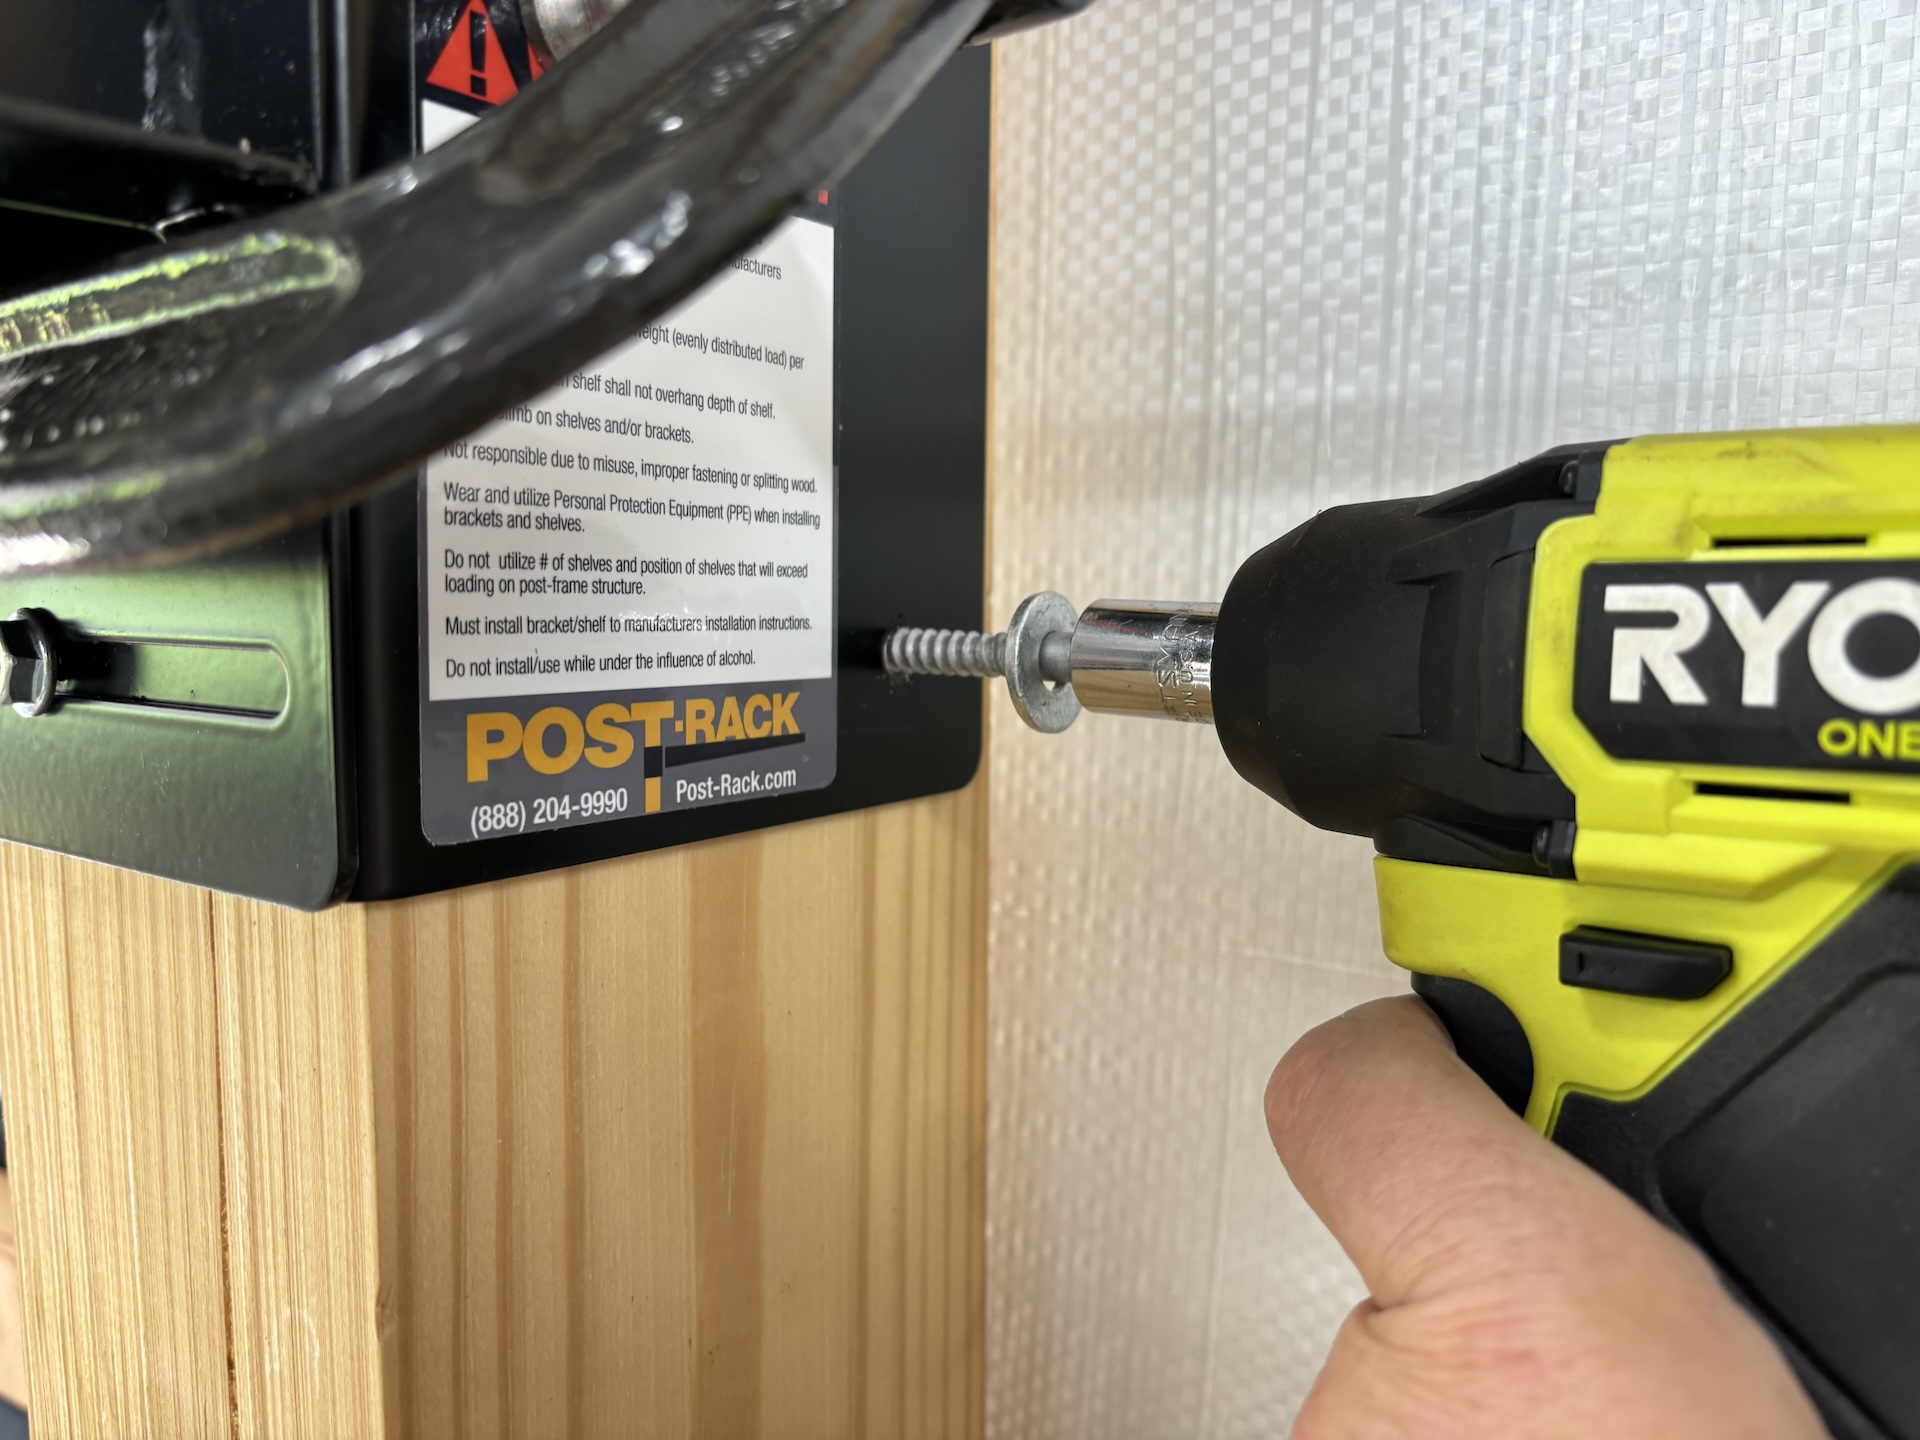
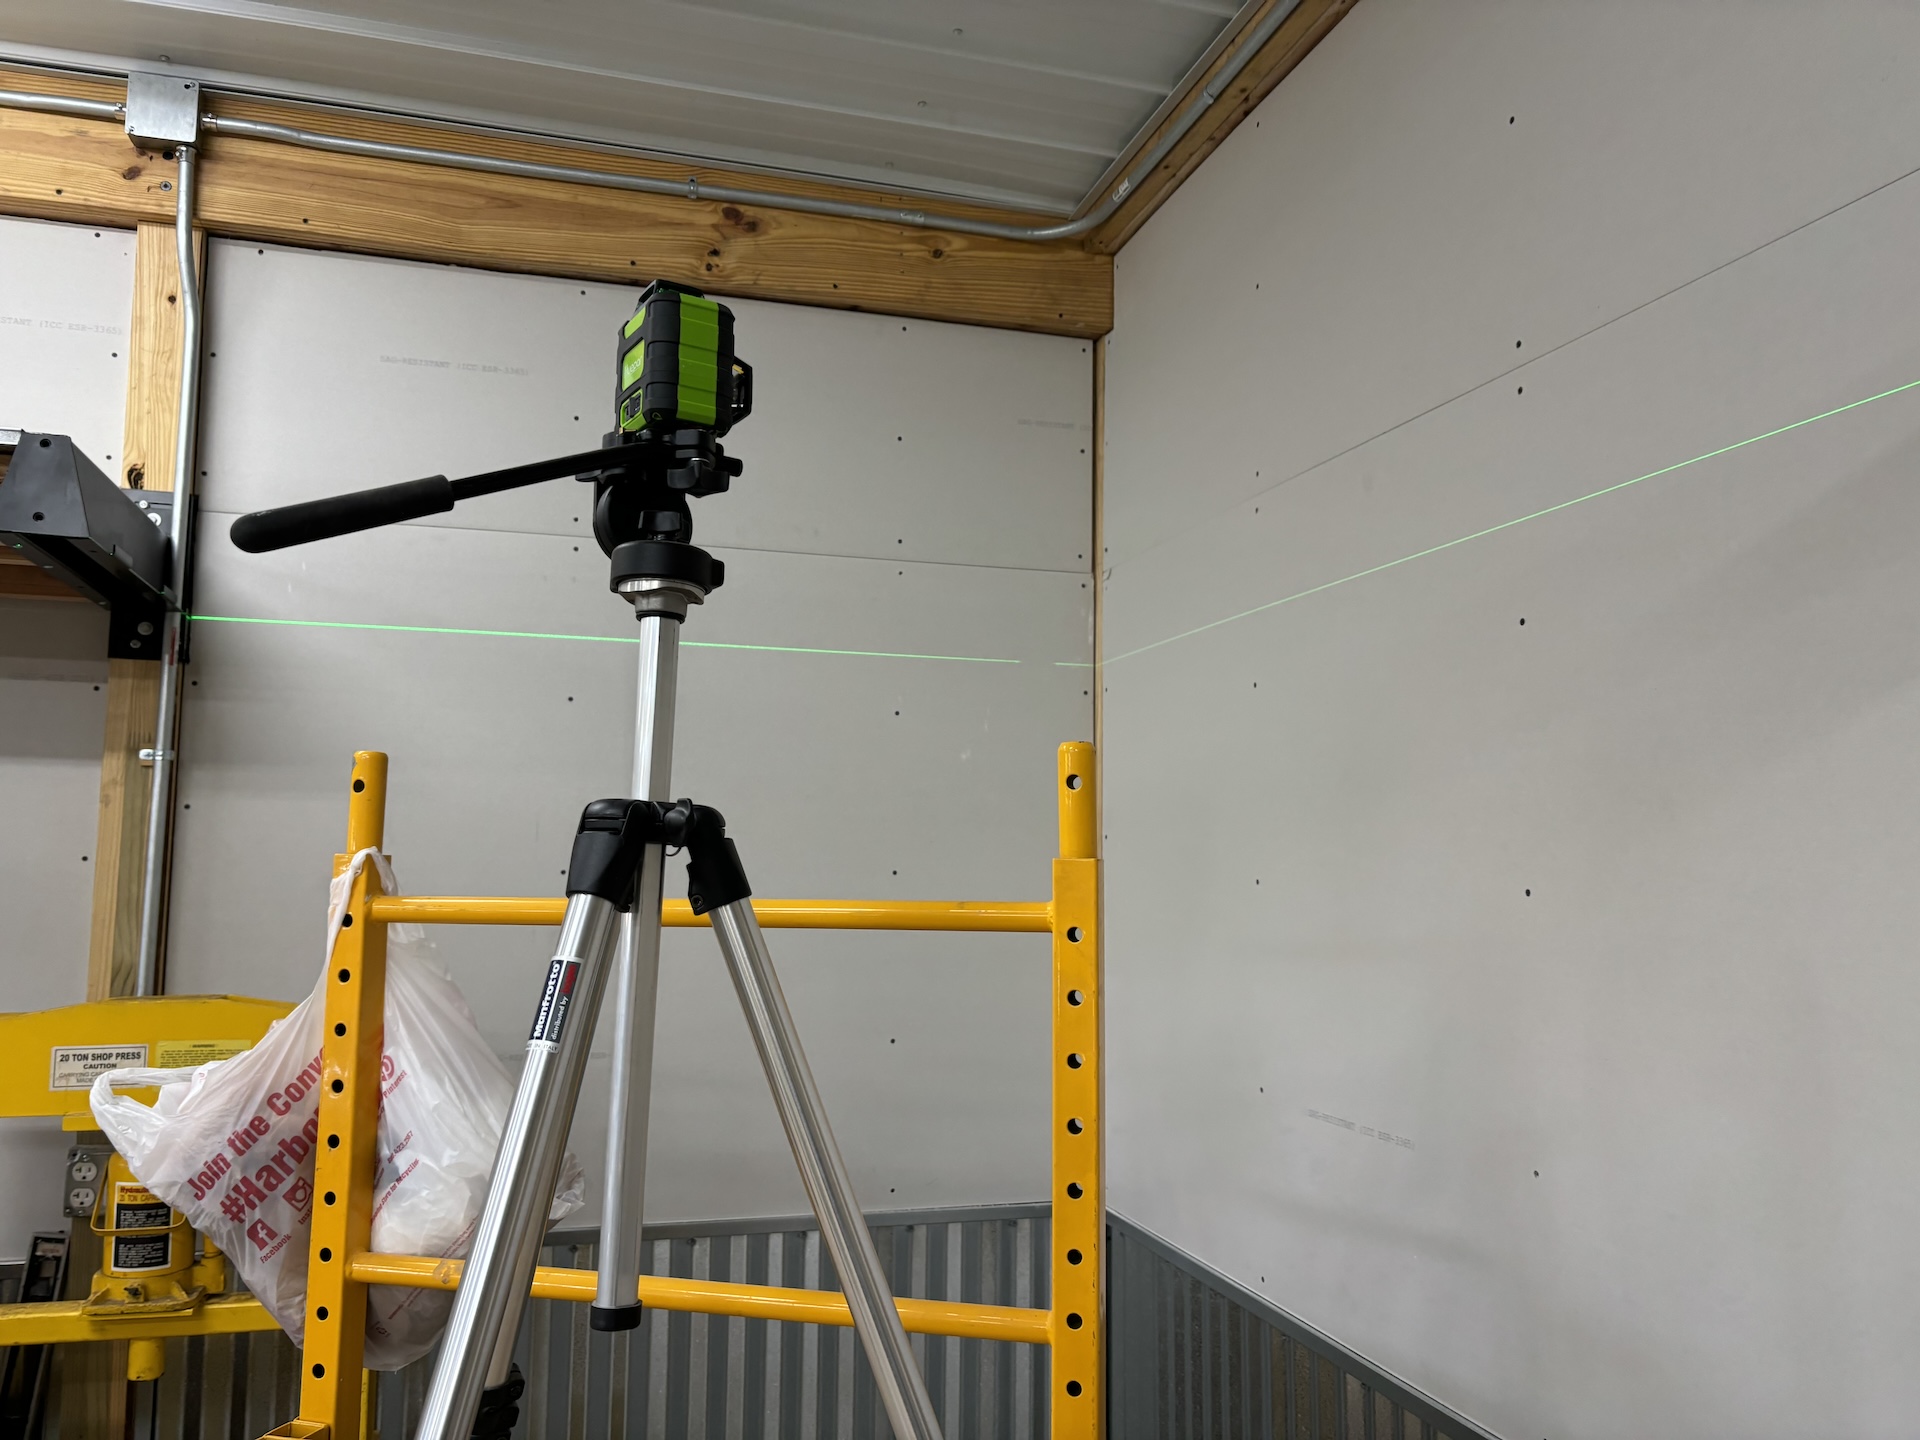
After I decided on the height of the bracket I used my laser level and marked off all the poles for the brackets. I found it easier to attach the bracket to the pole using a small screw to hold it in place to pre-drill the holes for the lag bolts. I installed the four lag bolts on the sides followed by the 2 on the front. The adjuster screws were tightened after all the lag bolts were in. Until all four of the brackets were mounted I kept moving with the installation.
In reality the mounting of the brackets is the easy part since the rest of the shelving is made of lumber supplied by me. Since the walls were going to be framed and drywalled I was going to wait until that was completed to start the shelves, fast forward a few weeks.
Fabricating the Shelves
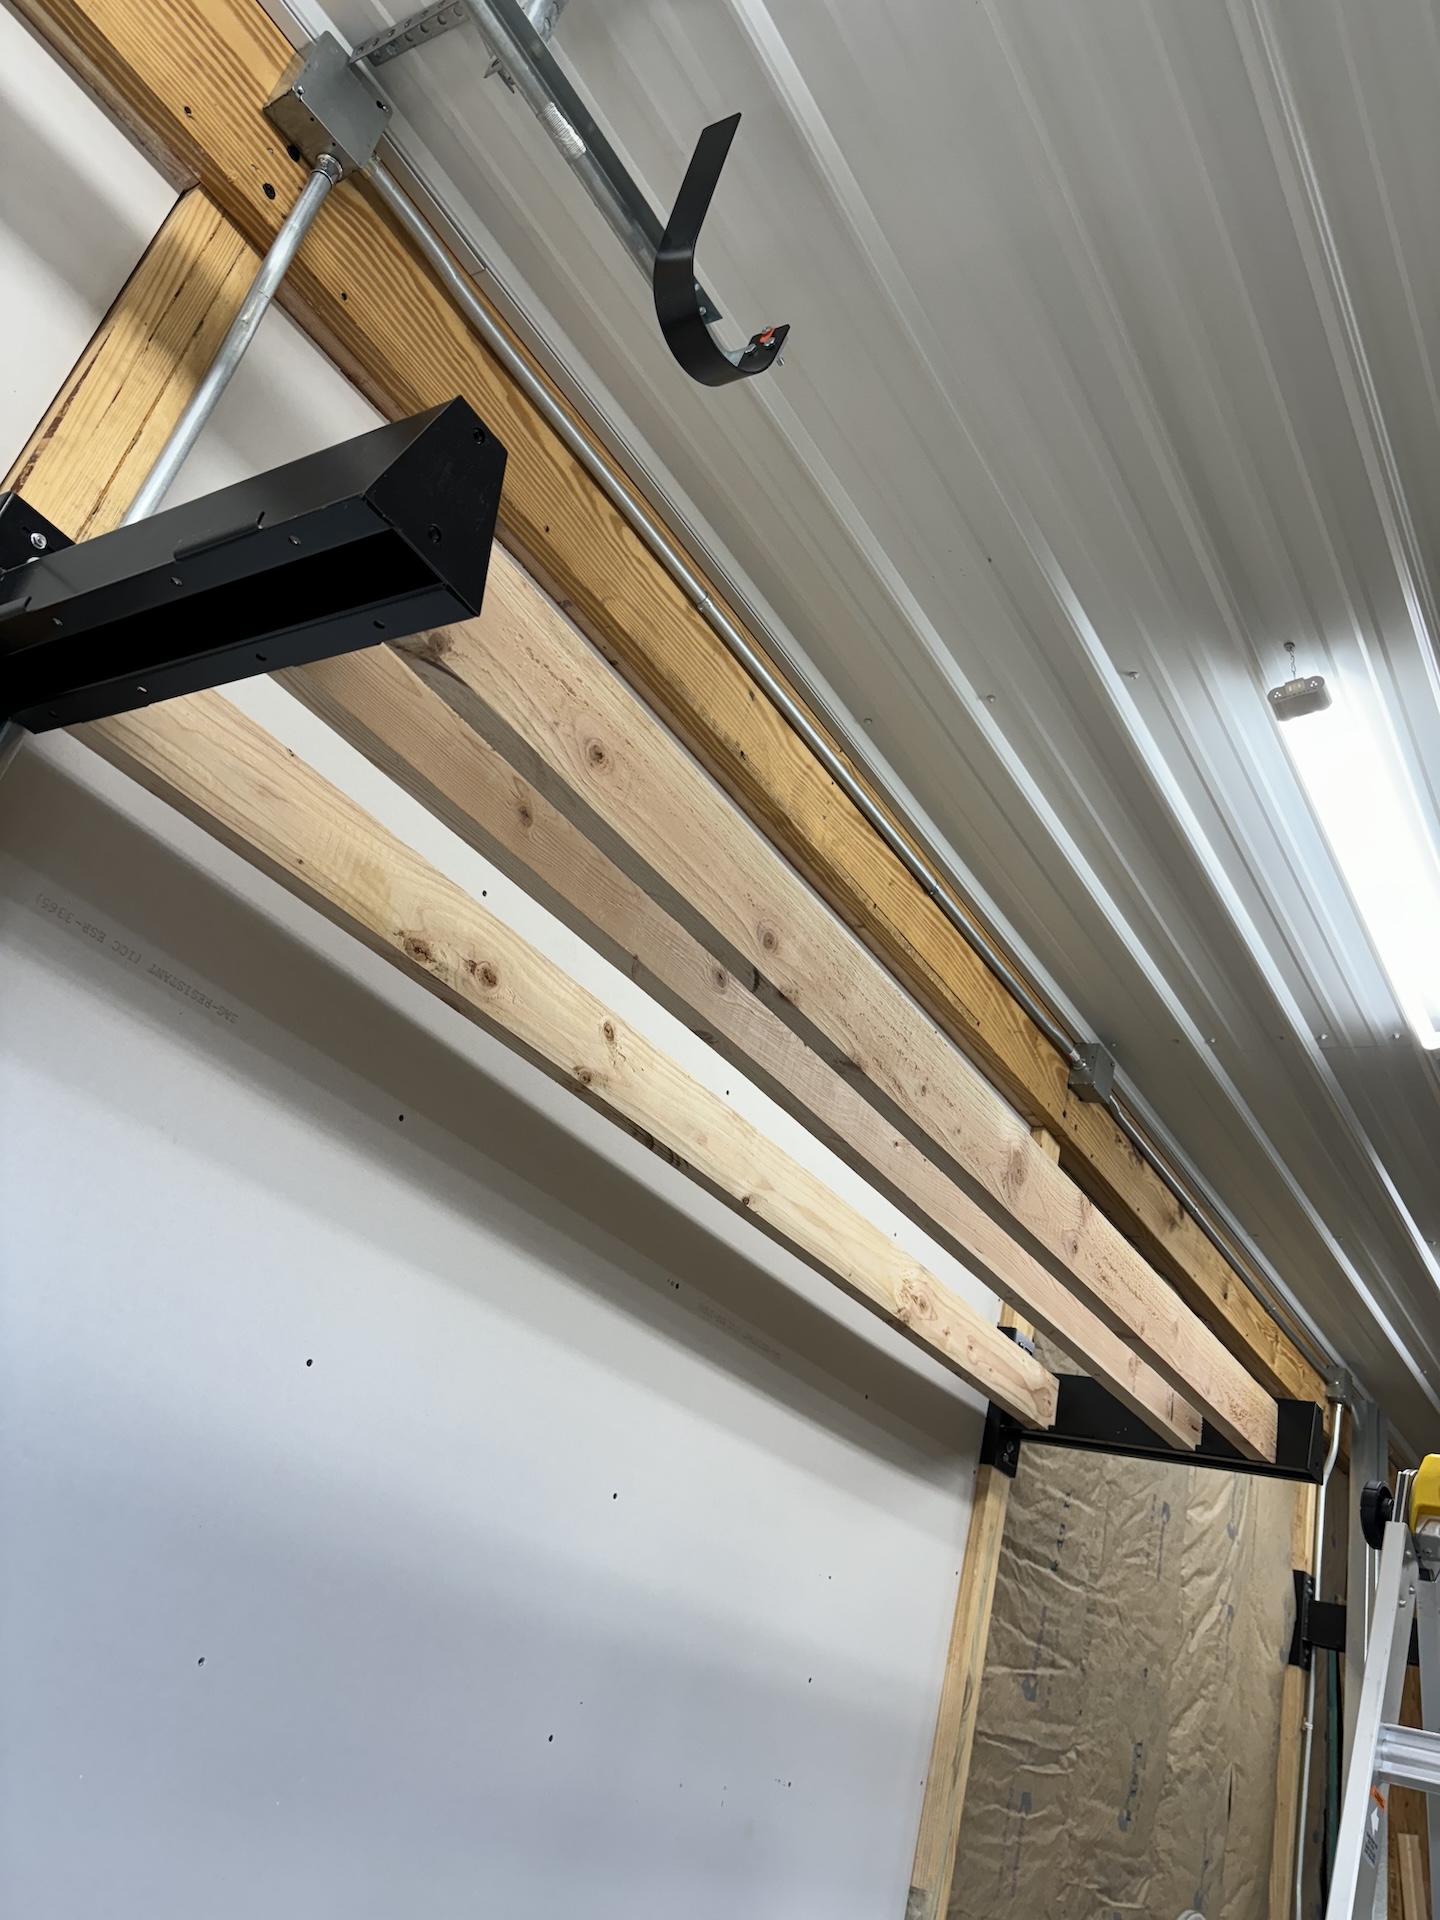
The instructions from Scott Systems say to use a 2×4 on end to make the span from bracket to bracket followed by a 2×12 on top to make the shelf. The shelf measures approximately 23 inches which is two 2×12’s side by side. I saw many people with different versions online and I decided to use a ripped 2×6 on end to make the span and topped it with plywood.
I’m sure there is a structural difference between the way I did it and the way Scott Systems recommends it. I am not sure and really this is about “the way I did it” and not really a recommendation from me. I don’t plan on stacking extremely heavy items on these shelves so I am assuming it will all be good.
The Corner
I treated the corner similar to how one might do a deck or floor. I bolted a header board to the framed wall studs and used metal joist hangers to attach the ripped 2×6’s. This created a solid connection to the wall and allowed the shelf to connect from the Post-Rack bracket. I then attached more joist hangers to the outermost ripped 2×6 to create a connection from the adjacent bracket. The corner seems very sturdy but I plan to keep that area light on load just to be safe.
Shelf Surface
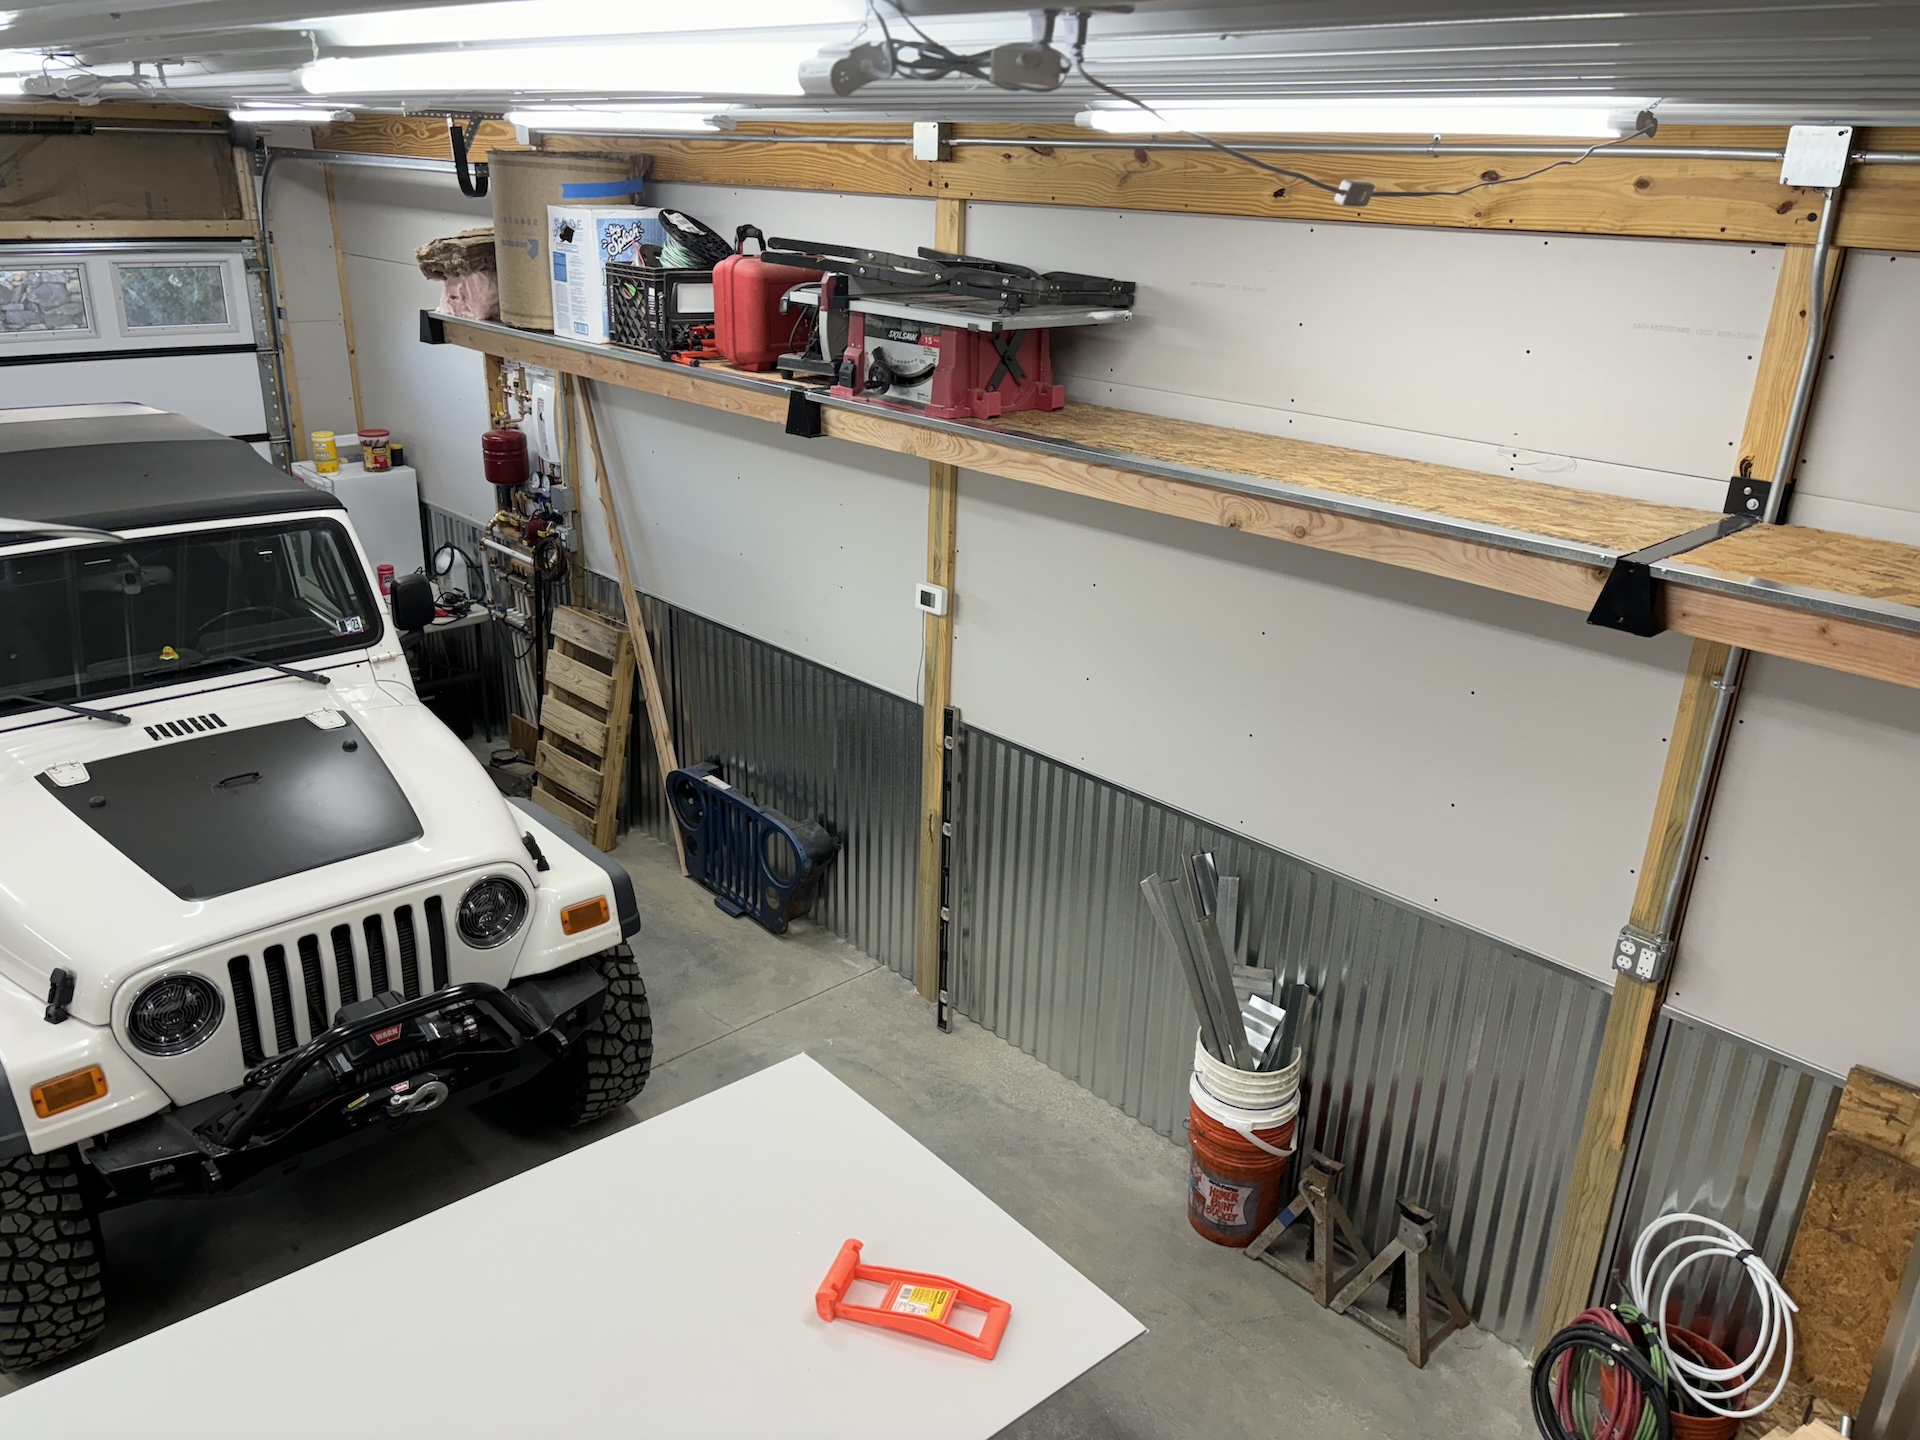
I had several pieces of OSB plywood and decided that they would work well. They were cut to fit and screwed to the ripped 2×6’s. I had a few pieces of J channel left from the lower walls so I used them to create a nice edge on the plywood. You can see by the picture how nicely items can be stored on the shelves.
Completion and Review
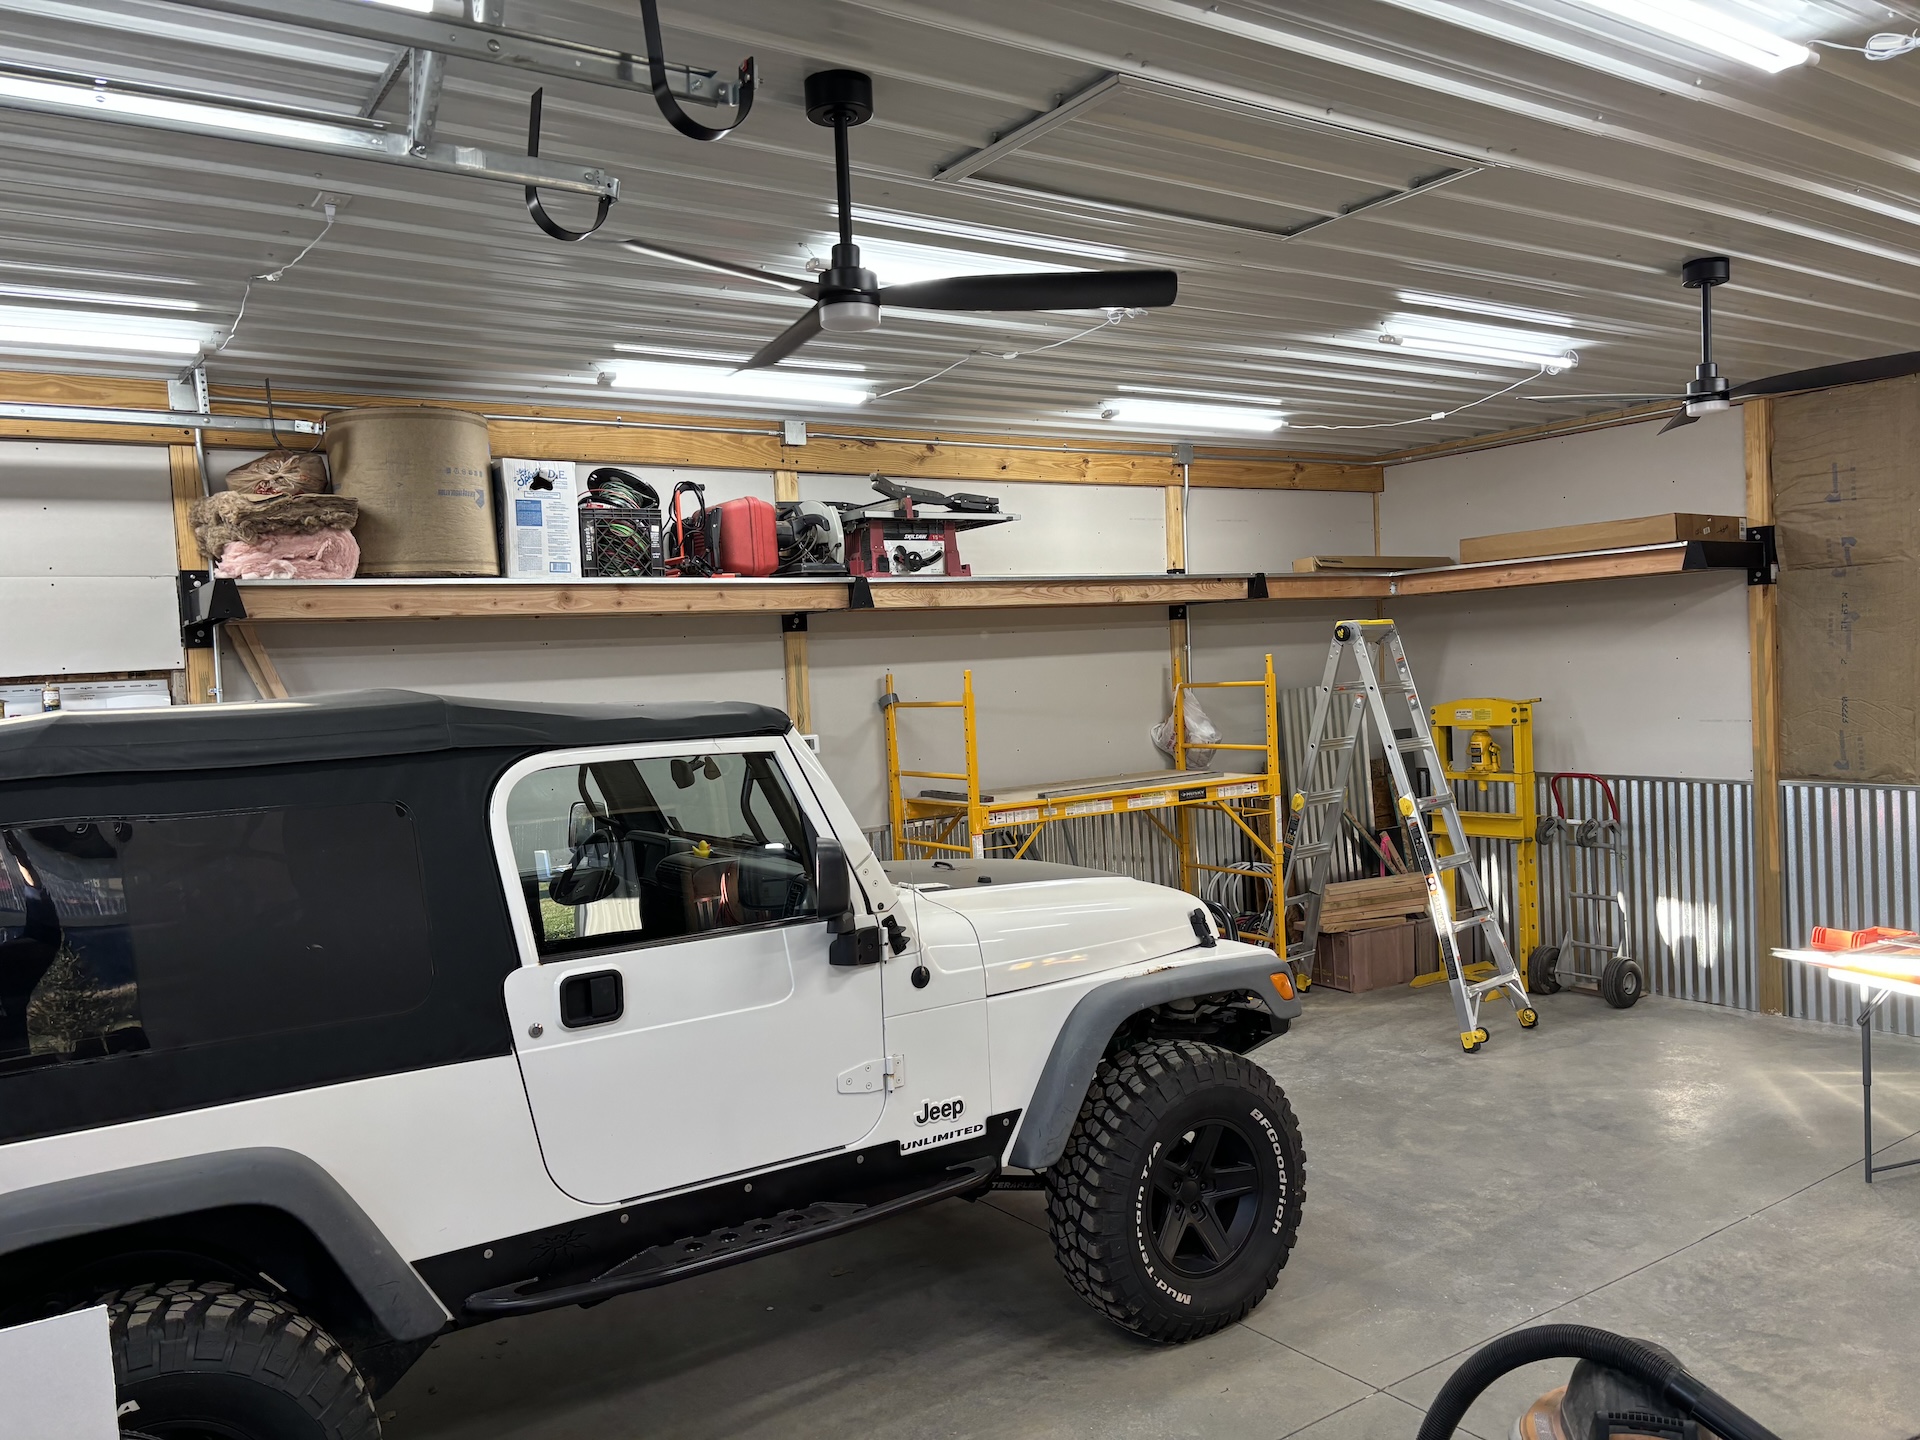
With it all wrapped up these shelves offer an amazing amount of storage. Probably the only challenge is the height and heavy items. Having a good ladder or some scaffolding makes it much easier. They are solid and sturdy and the way the shelf attaches to the bracket is simple but very effective. These brackets really save a lot of time when building shelves.

Check out the Post-Rack brackets from Scott Systems, nice people and a great product.